Authors: Dr. Erick Mota González, Dr. Daniel Capitán Maraver, Dra. Elena Isern Pi, Dra. Sara Sabría, Dr. Pablo Barenblit Scheinin
Introduction
The techniques for placing dental implants are evolving constantly, further seeking techniques to reduce morbidity and time in our everyday surgeries. Computer-guided surgery is considered an efficient, predictable and reproducible alternative, with its advantages and limitations just like any other type of technique. A great difficulty we have today is achieving a highly aesthetic result in restorations on structures and Avinent, with the development of the innovative customised and 3D printed AURORA structures, has revolutionised the market.
Clinical case
Male patient aged 57 years, smoker and without relevant medical background, attended the clinic without particularly high expectations, wishing to improve his oral health and aesthetics.
When performing the intraoral examination, it was observed that the patient presented generalised periodontal disease with multiple root fragments and carious lesions. In the X-ray, the presence of multiple periapical infections were observed.

Pre-operative ORP 
Patient’s initial situation
Patient’s initial situation
Patient’s initial situation


After making this diagnosis, both clinical and radiological, and having evaluated the prognosis of the remaining teeth, the extraction of all teeth was recommended, with a prior hygiene stage, placement of 6 implants in the upper arch using guided surgery with a complete implant-retained fixed restoration, and placement of four implants in the lower arch for a removable overdenture with locator abutments.
Procedure
Once the recommended hygiene treatment had been carried out, all remaining teeth were extracted. During the three-month healing period, the patient was given immediate complete provisional upper and lower prostheses, with correct DV and satisfactory aesthetics, function and phonetics.
In this case, the use of digital flow was considered from the start of the surgical process up to the final prosthesis, simplifying the work of both the clinician and the laboratory and thus providing accuracy in the final result of the treatment.
The parameters of the complete provisional prosthesis were those used to design the definitive prosthesis. Software (3shape) was used for the surgical planning of the implant placement, guided by the prosthesis and not by the patient’s bone availability.
To make the radiographic splint, a duplicate of the validated overdenture is needed, made with transparent material and reference points by the prosthetics laboratory.
Post-exodontic cicatricial tissue and complete provisional prostheses Radiographic splint


Two CBCT were taken, one of the splint only and the other of the patient with the splint in the mouth. Moreover, the splint was scanned to be able to digitise the prosthetic plan. The two files, DICOM and STL, were combined using the Implant Studio design software (3shape). Alongside the AVINENT planning department, we designed and manufactured a surgical splint that would enable us to carry out the pilot drilling procedure to guide our implants into the correct three-dimensional position and accurately avoid important anatomical structures such as the maxillary sinus.
Screenshots of planning the implants and designing the surgical splint
Screenshots of planning the implants and designing the surgical splint
Screenshots of planning the implants and designing the surgical splint
Screenshots of planning the implants and designing the surgical splint


In this case it was a mucosa-supported surgical guide with removable occlusion key secured with 2 anchor pins (Biomimetic Ocean Surgical Guide).
Details of the removable surgical splint 
Details of the removable surgical splint


It involves infiltrative anesthesia by placing five articaine carpules distributed throughout the maxilla, the surgical splint was placed in the mouth with the detachable occlusion key and with the prosthetic antagonist, in order to stabilize the surgical splint in the correct planned position.
Once stabilized in the correct position, the surgical splint was fixed with the “anchor pins” and the occlusion key and the antagonist were removed from the mouth. Pilot milling was performed, which would help us place the implants in a prosthetically ideal position. We removed the surgical splint from the mouth and with a 15C scalpel we made a crestal incision and flap lift to obtain a greater view of the field of work., Once the planned milling protocol was performed, we placed six internally connected Biomimetic Ocean® implants ( Avinent Implant System®) 3.5 x 11.5 mm. In planning, the need for guided bone regeneration had already been foreseen, for the quality used particulate xenograft (Geistlich Bio-Oss®) and collagen membranes (Geistlich Bio-Gide®). For this bone regeneration, each membrane was fixed by vestibular with two pushpins (Meisinger®) and they were sutured by palatine to give us greater stability of our bone regeneration. To achieve a primary closure of the wound, the flap had to be wasted and sutured with Supramid® 3/0 to achieve mattress and simple stitches.
In the lower arch, 4 implants were placed for the use of overdenture with locators.
Mucosa-supported splint fixed in the mouth
Mucosa-supported splint fixed in the mouth
Post-placement x-ray


Images of surgery
Images of surgery
Images of surgery
Images of surgery


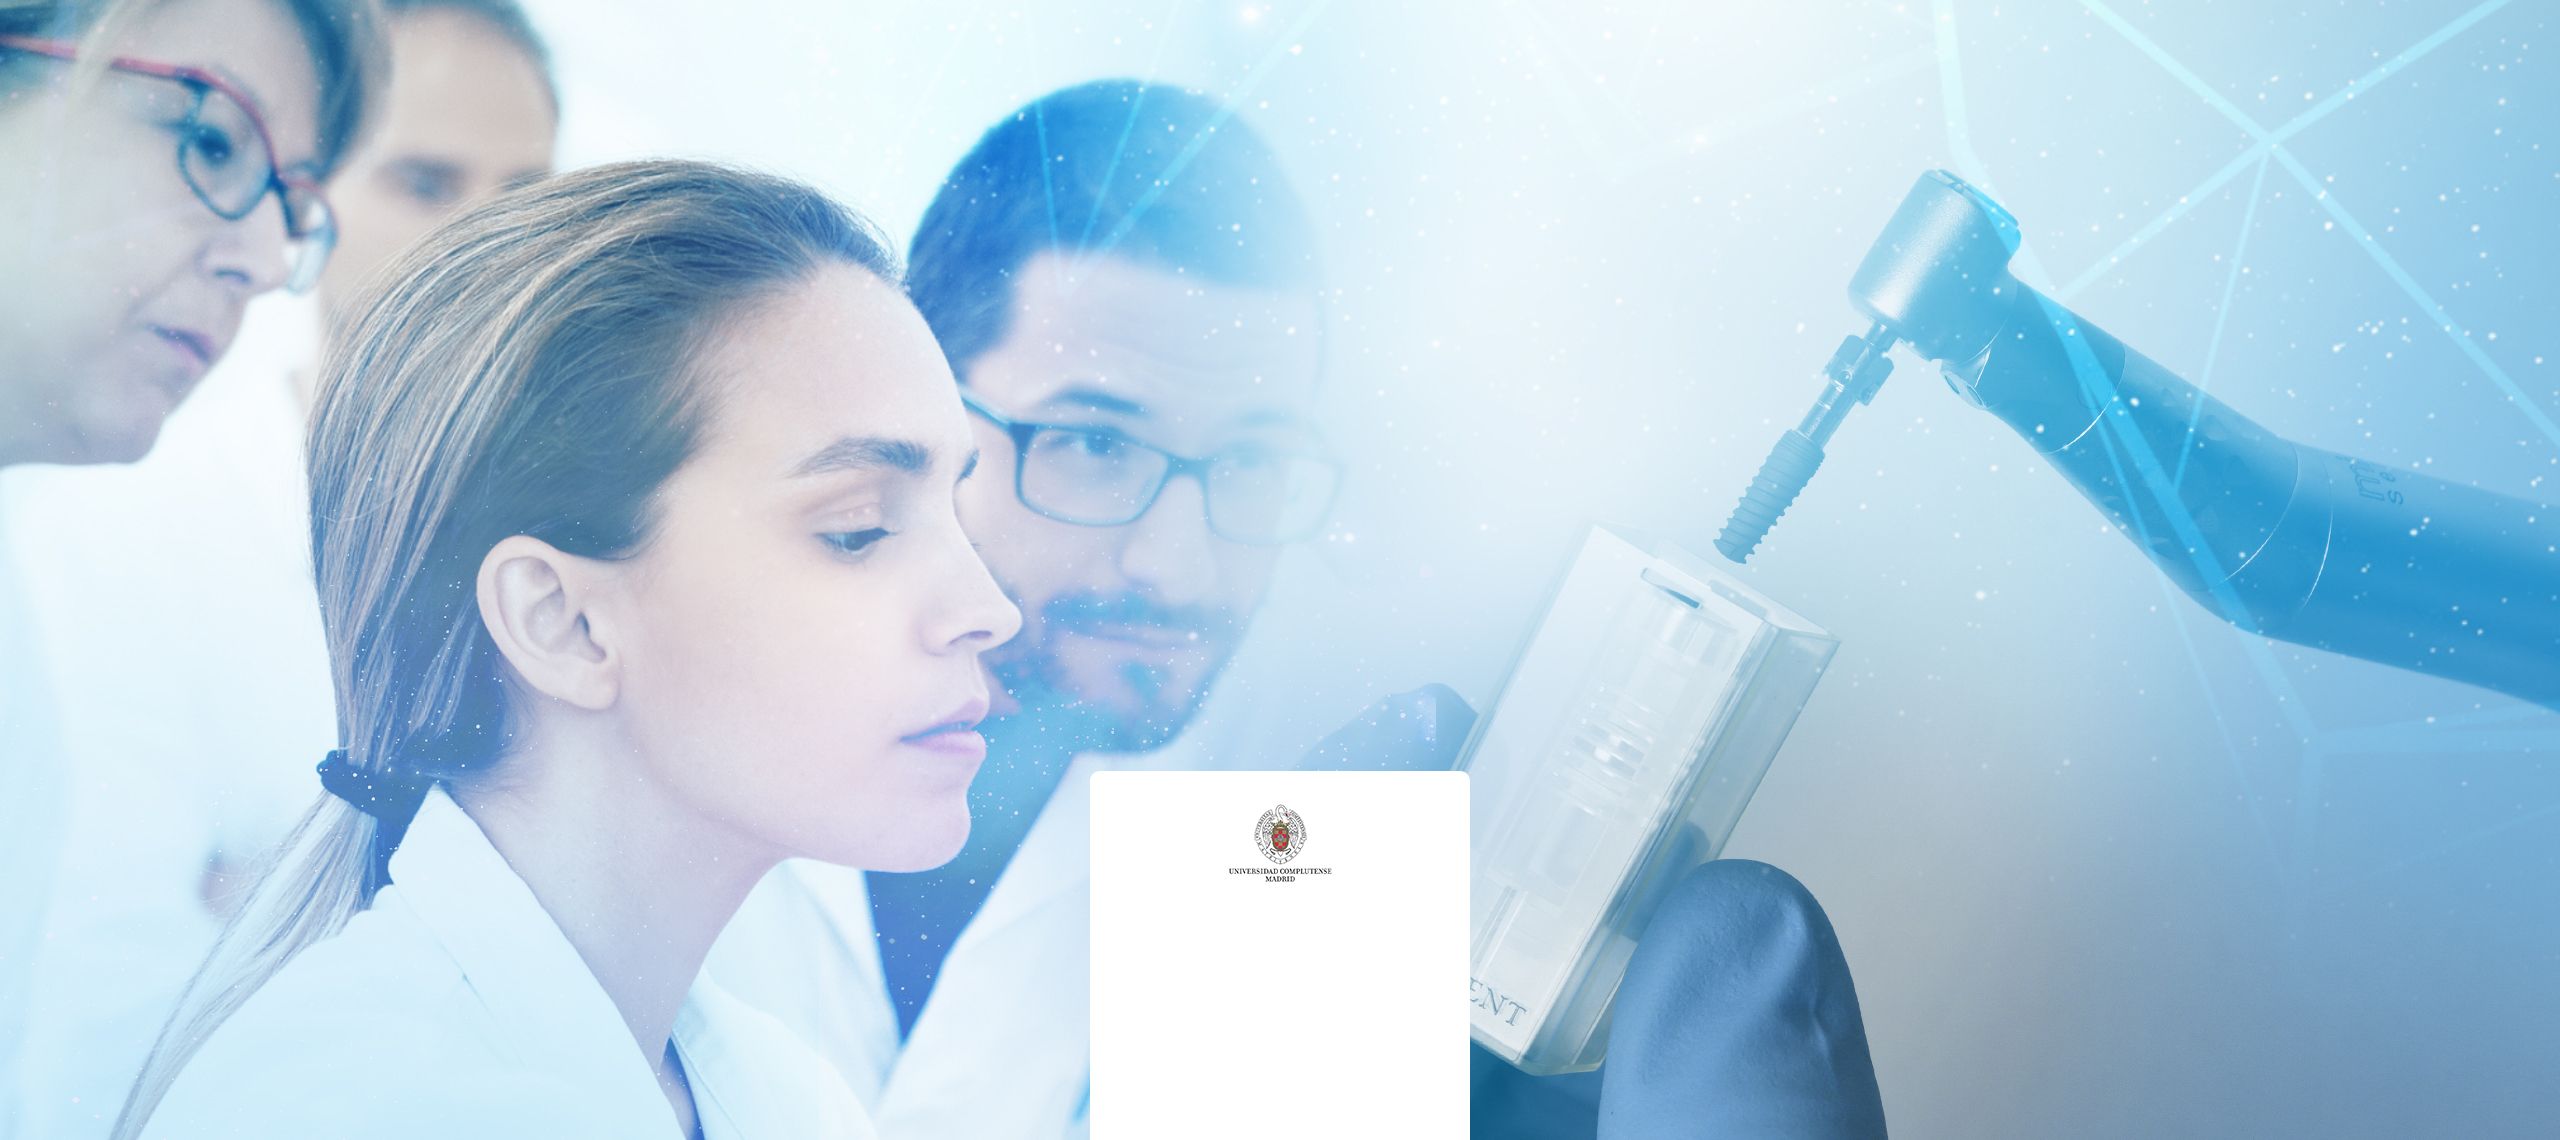
After a period of 6 months of osseointegration, the transepithelial abutments were placed in the upper maxilla; uniblock straight abutments (Avinent) on the axial implants and 17º abutments (Avinent) for the angled implants, to be able to make a passive prosthesis. After two weeks, the printing was carried out with the Trios (3shape) intraoral scanner.
Again, digital flow was used for the design and drilling of the structure of the definitive prosthesis. The patient was rehabilitated with an Aurora Premium implant-supported prosthesis (Avinent Implant system) with individual Enamic (Vita) crowns. The Aurora solution consists of a metal titanium structure with a surface roughness and shoulder design that aid connection with the crowns that are cemented individually. The cementing process of the crowns and make-up of the hybrid prosthesis is done at the laboratory.
Aurora internal structure
Finishing process of the Aurora prosthetic structure
Finishing process of the Aurora prosthetic structure


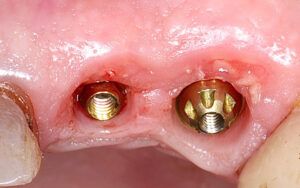
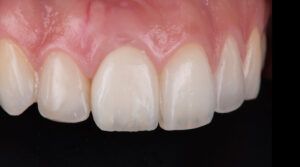
Finally, the definitive prostheses were fitted, achieving satisfactory aesthetics and function, in addition to thermal stability and maintenance of the soft tissues. The patient was shown oral hygiene measures, and checks and maintenance of the prosthesis.


Details of the finished prosthesis in the mouth
Details of the finished prosthesis in the mouth


Clinical result:
We obtained a successful and predictable result, exceeding our patient’s expectations. He gained the correct function and occlusion he had lost, as well as a good level of aesthetics.
Conclusion of the case:
The integration of digital systems in dental medicine has enabled the interconnection of the “clinician-laboratory-brand” to be able to offer our patients innovative systems that will enable us to be more assertive in our planning and treatment, benefiting the patient with lower morbidity and treatment time, as is the case with guided surgery. The design of the AURORA structures gives the patient greater comfort of the prosthesis in the mouth, as they are lighter prostheses that allow customisation and aesthetics that are difficult to achieve in treatments with similar prostheses, in addition to quick manipulation if repairs are needed.
This type of digital procedures entails teamwork and a long learning curve, so I would like to thank the excellent team at AVINENT and the incredible work of the laboratory Odontecnic, S.L. the effort, drive and dedication of my colleagues and teachers of the Master’s of Implantology and Oral Prostheses at the Universitat de Barcelona. Without them, this type of treatment would be very difficult, almost impossible.
Pre-operative ORP
Patient’s initial situation
Patient’s initial situation
Patient’s initial situation
Post-exodontic cicatricial tissue and complete provisional prostheses
Radiographic splint
Screenshots of planning the implants and designing the surgical splint
Screenshots of planning the implants and designing the surgical splint
Screenshots of planning the implants and designing the surgical splint
Screenshots of planning the implants and designing the surgical splint
Details of the removable surgical splint
Details of the removable surgical splint
Details of the removable surgical splint
Mucosa-supported splint fixed in the mouth
Mucosa-supported splint fixed in the mouth
Post-placement x-ray
Images of surgery
Images of surgery
Images of surgery
Images of surgery
Aurora internal structure
Finishing process of the Aurora prosthetic structure
Finishing process of the Aurora prosthetic structure
Details of the finished prosthesis in the mouth
Details of the finished prosthesis in the mouth
Details of the finished prosthesis in the mouth
Details of the finished prosthesis in the mouth
Details of the finished prosthesis in the mouth


Bibliografia:
- Brief J, Edinger D, Hassfeld S, Eggers G. Accuracy of image-guided implantology. Clin Oral Implants Res. 2005;16(4):495–501.
- Pettersson A, Komiyama A, Hultin M, Näsström K, Klinge B. Accuracy of Virtually Planned and Template Guided Implant Surgery on Edentate Patients. Clin Implant Dent Relat Res. 2012;14(4):527–37.
- De Almeida EO, Pellizzer EP, Goiatto MC, Margonar R, Rocha EP, Freitas AC, et al. Computer-guided surgery in implantology: Review of basic concepts. J Craniofac Surg. 2010;21(6):1917–21.