Case:
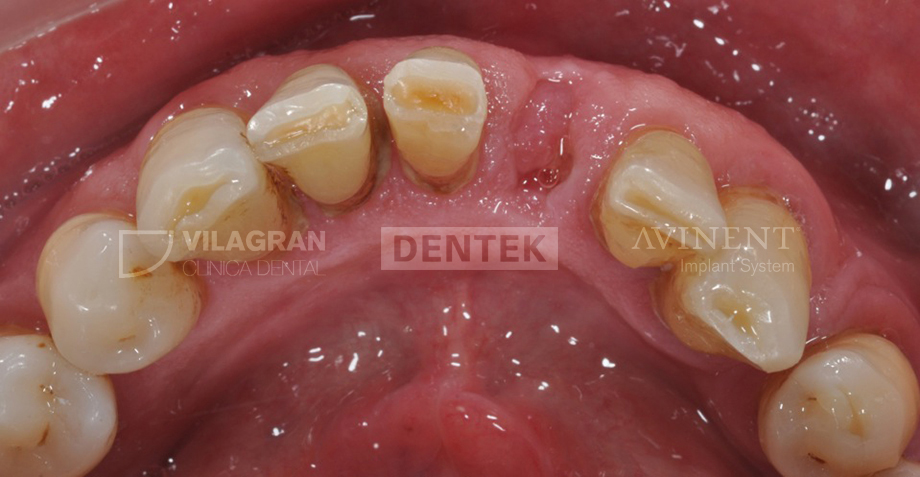
A 58-year-old patient came to the office for the loss of 31. During the examination, mobility of 32, 41, and 42 due to periodontal involvement was observed.
The radiological examination (CBCT) detected more than 75% bone loss.
TREATMENT PLAN:
- Hygienic phase
- Planning of immediate implants with guided surgery (3Shape Implant Studio™) on 32 and 42 after extraction of 32, 41, and 42, and preparation of an immediate 32-31-41-42 prosthesis previously designed from the initial digital impression (3Shape Trios™)
SEQUENCE OF TREATMENT:
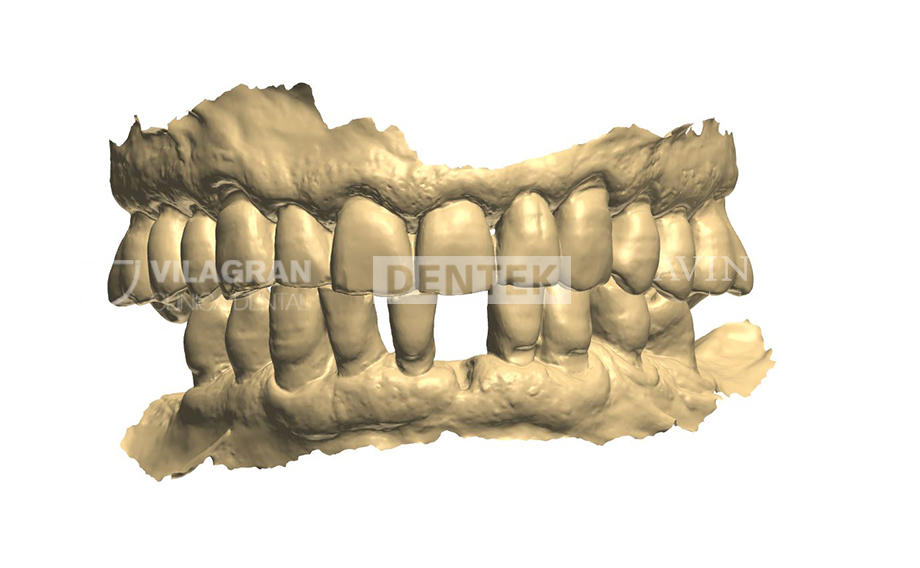
- Digital impression with 3Shape Trios™ (to plan the guided implants)
- Newtom CBCT
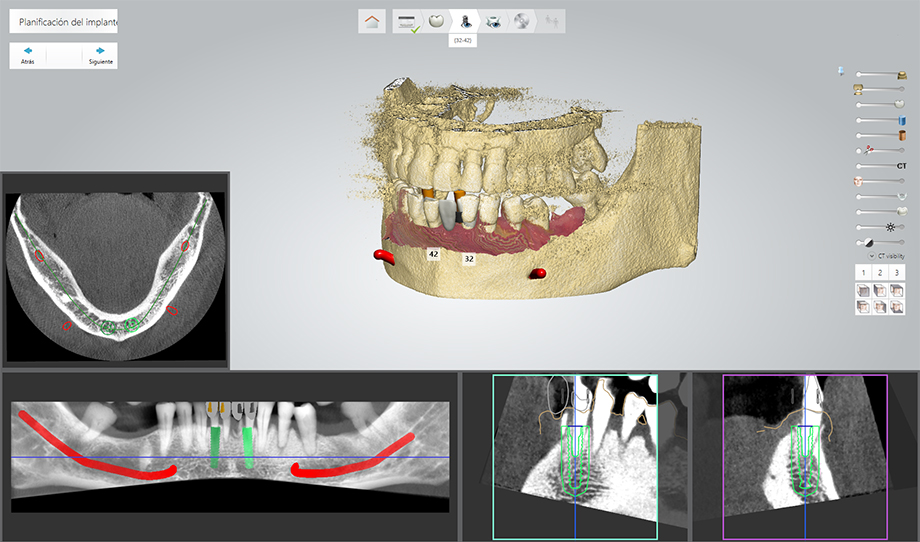
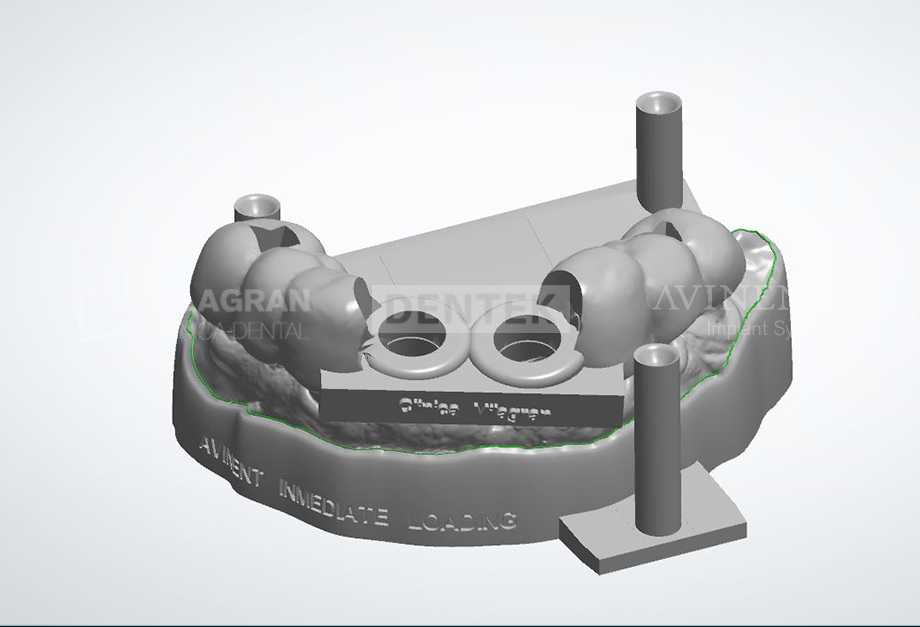
- Implant Studio™ Implant Planning and Surgical Guide Design
- Virtual extraction of 32, 41, and 42
- Avinent Ocean HI 3.5 x 15 Implant Planning
![]()
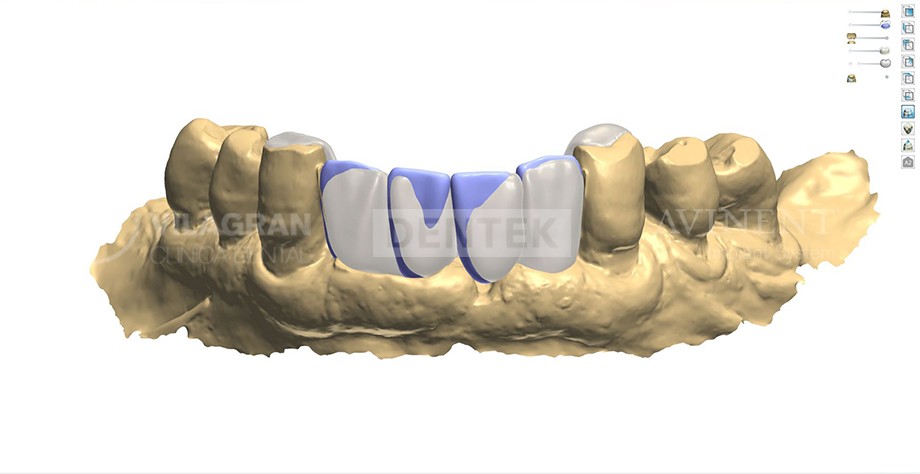
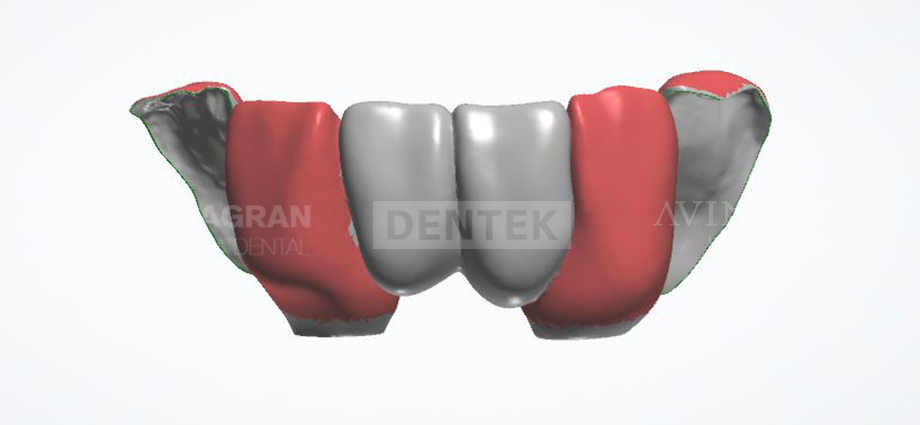
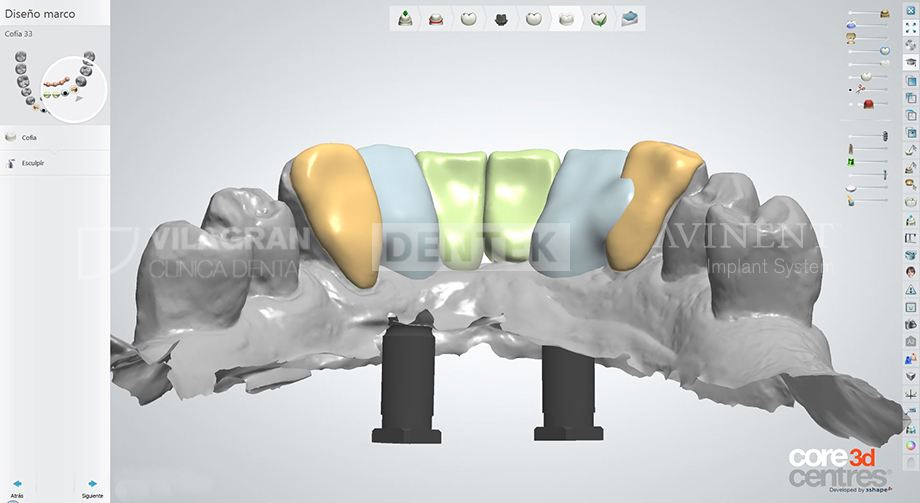
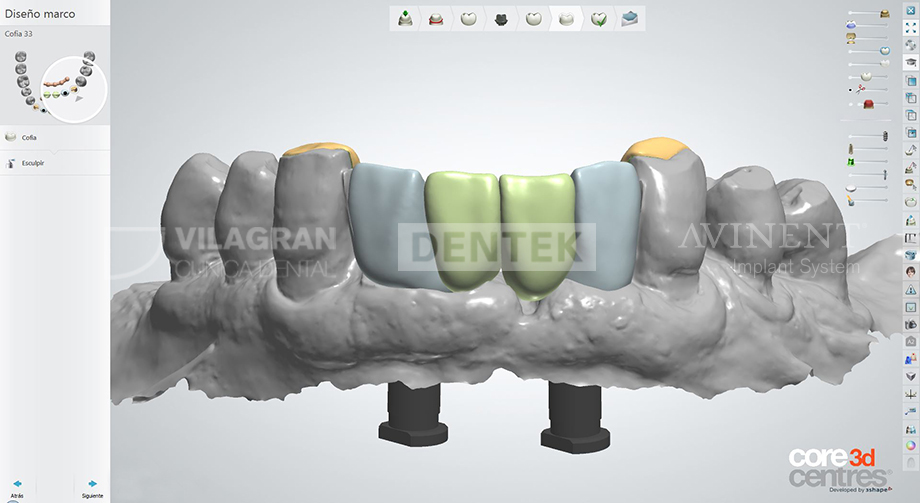
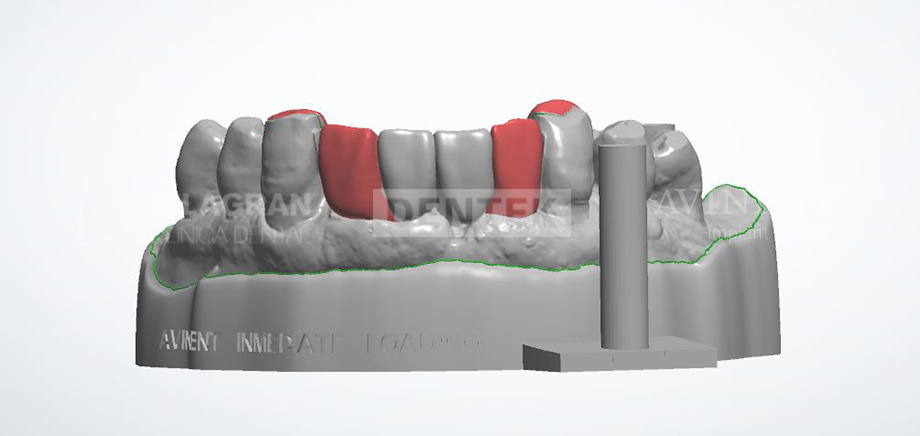
1. Transmission of the Implant Studio™ project for design of the 32-31-41-42 prosthesis using CAD Design Software (design of flanges extending over the adjacent teeth to correctly position the prosthesis).
![]()
![]()
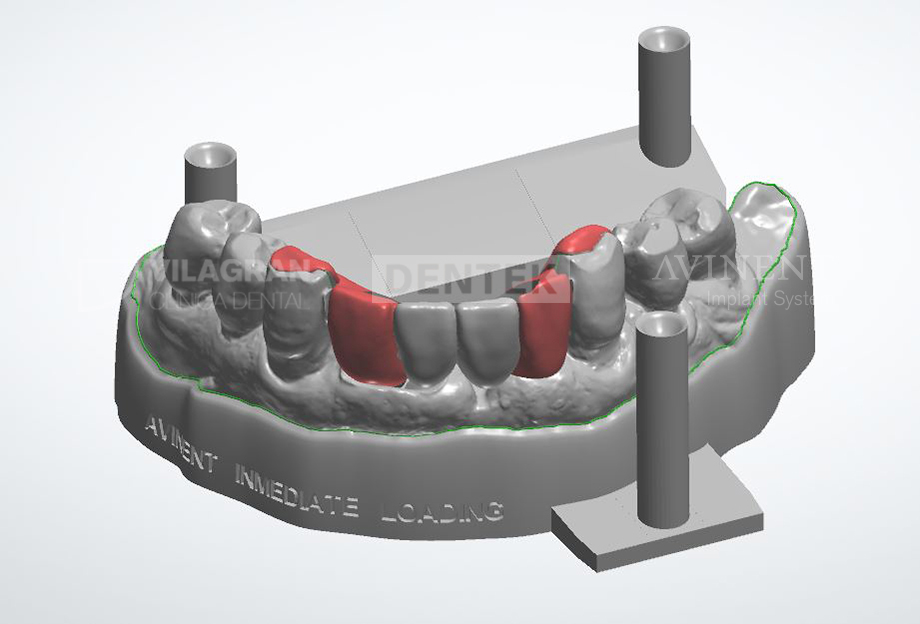
2. The Implant Studio™ project is transmitted to the milling center for 3D printing of the working model and the surgical guide.
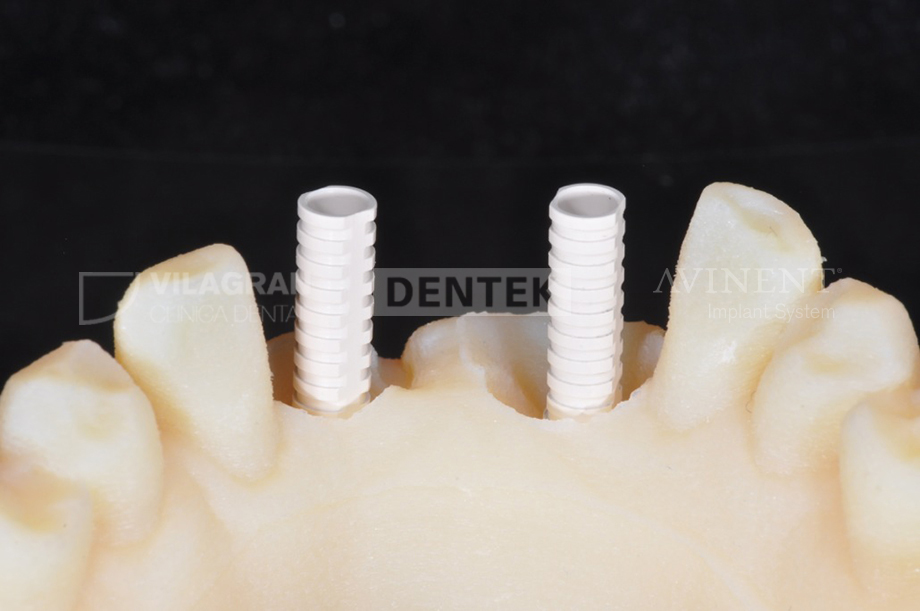
![]()
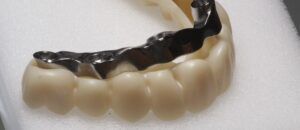
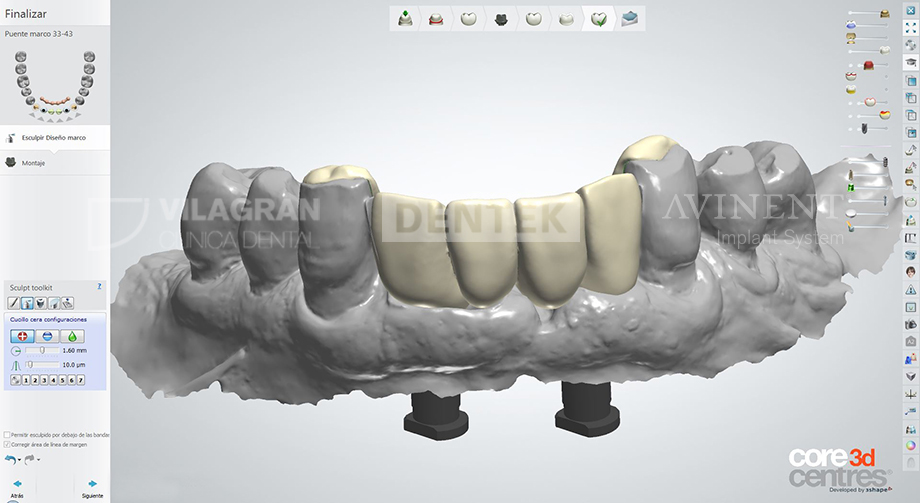
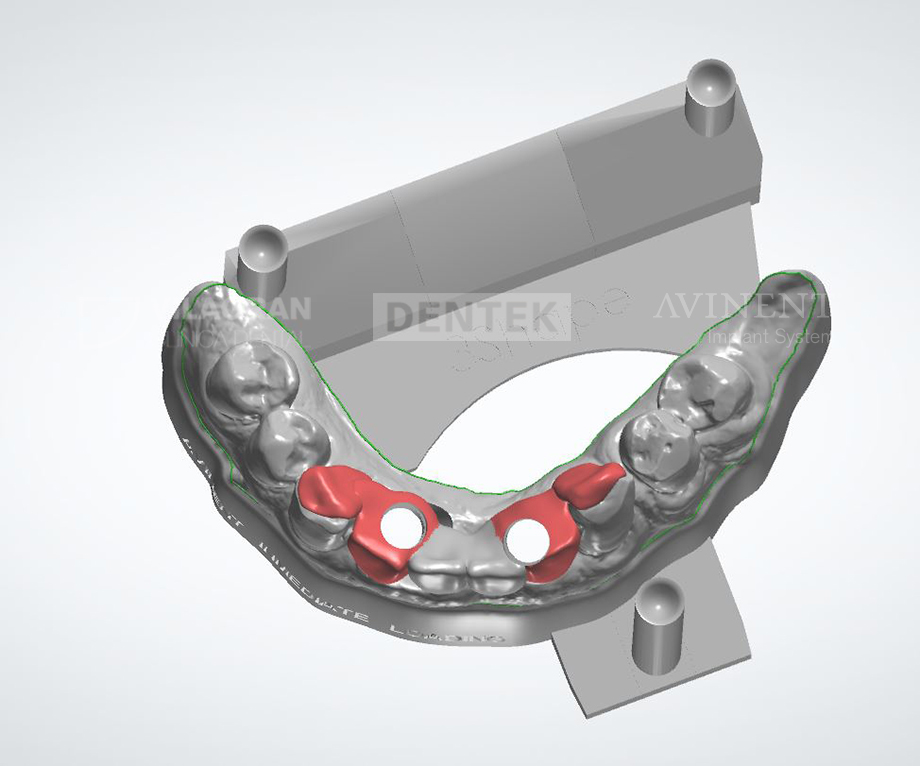
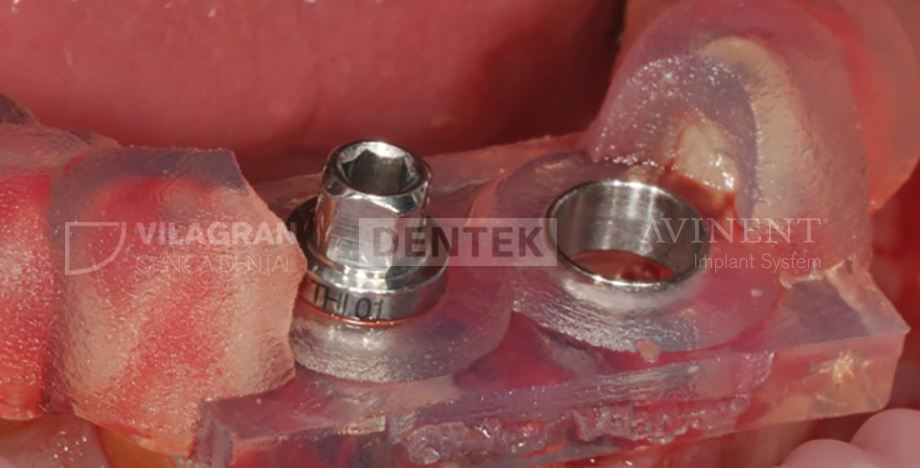
3. The milling center receives the design from the laboratory for the preparation of the Telio provisional bridge and selection of the PEEK rotational posts used to prepare the guide after surgery.
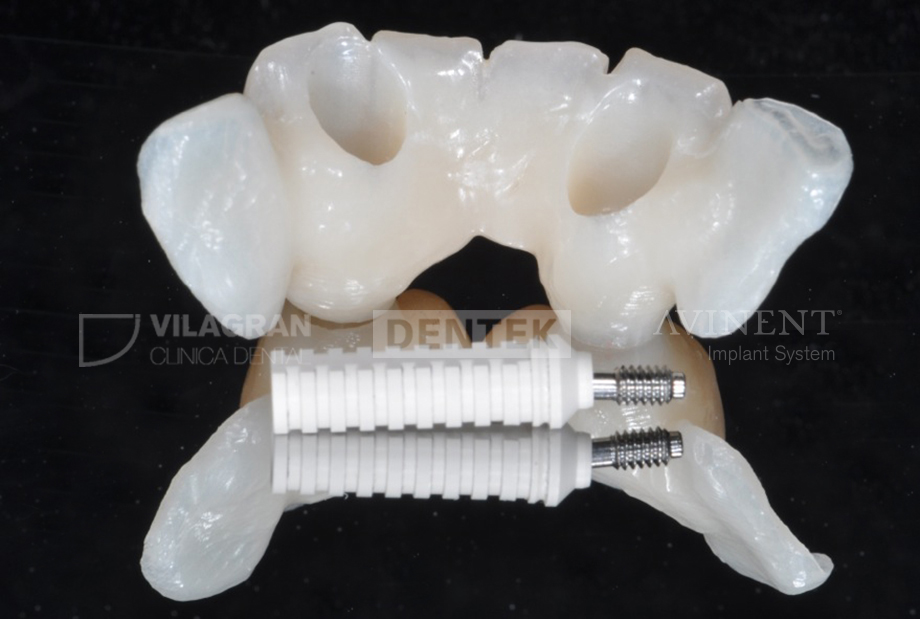
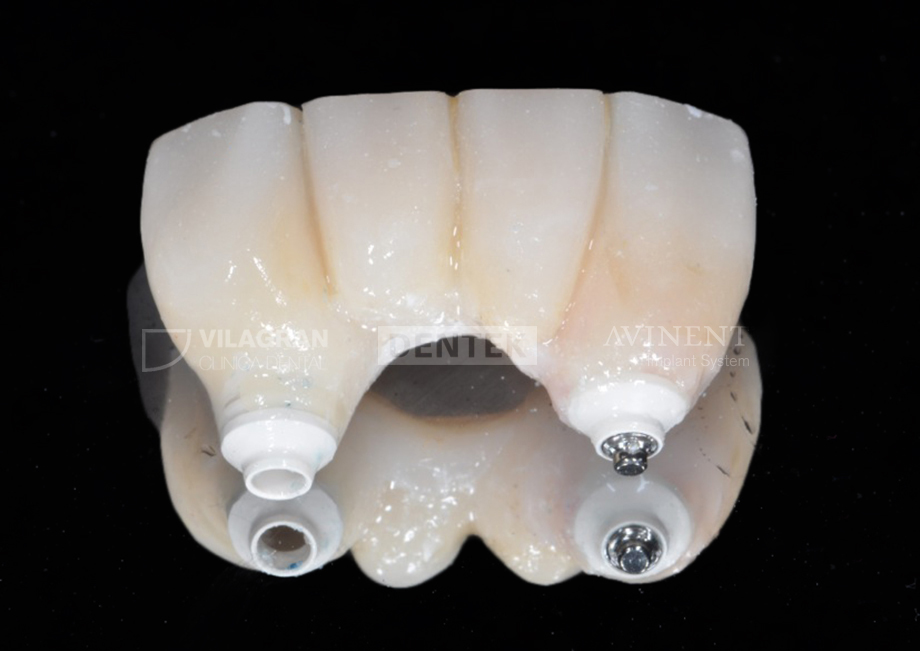
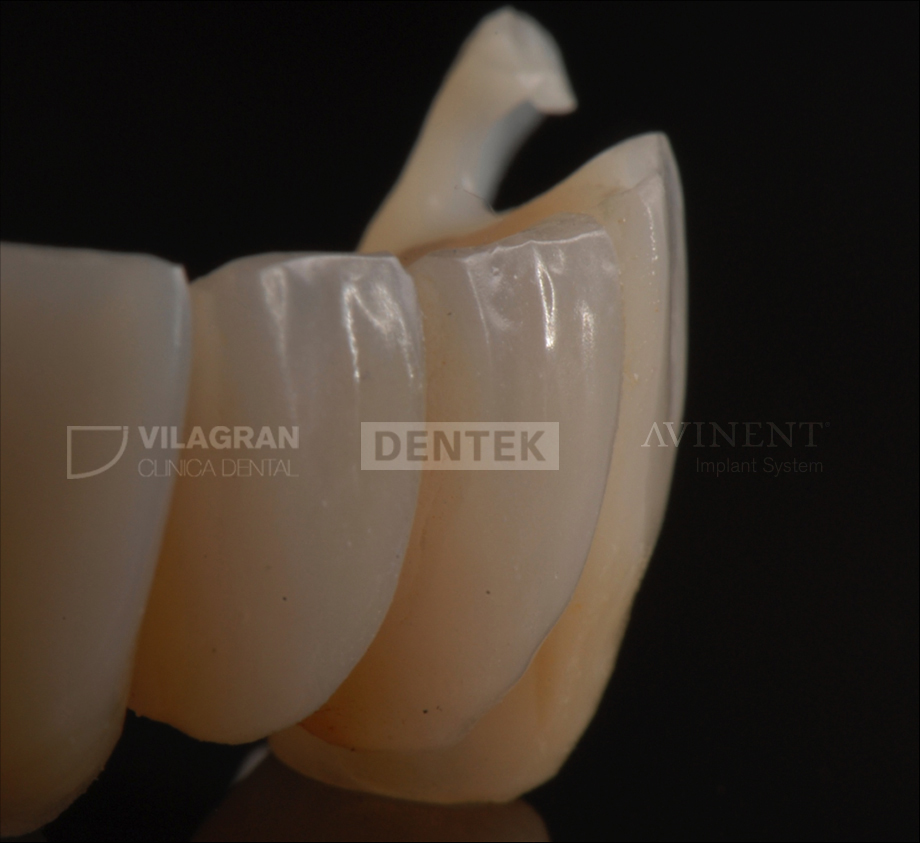
4. Return of the Telio provisional bridge to the laboratory for polishing and veneering.
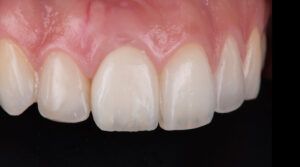
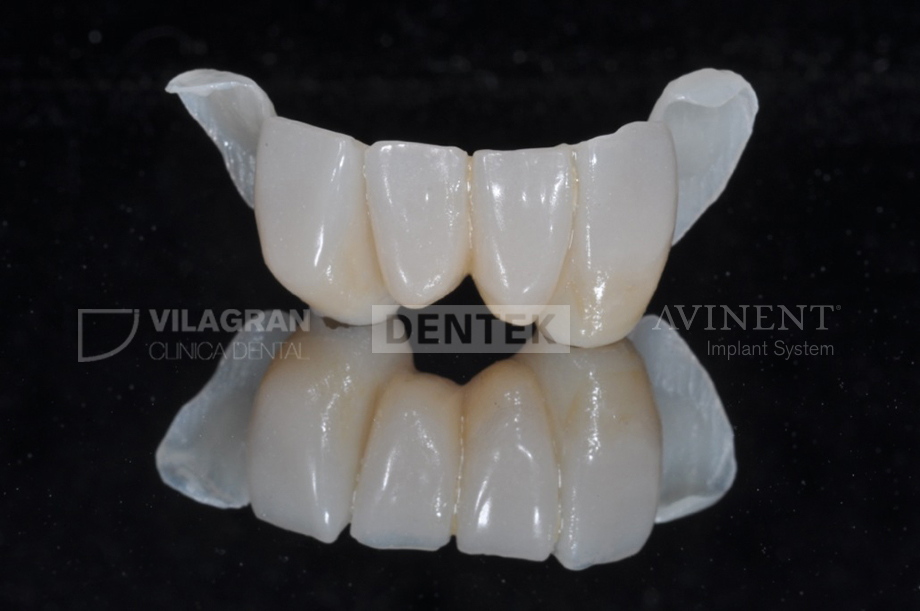
![]()
Comparison of the Telio provisional bridge and cosmetic finish as received from the laboratory.
![]()
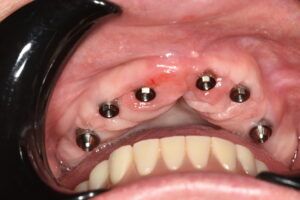
5. Guided implant surgery
![]()
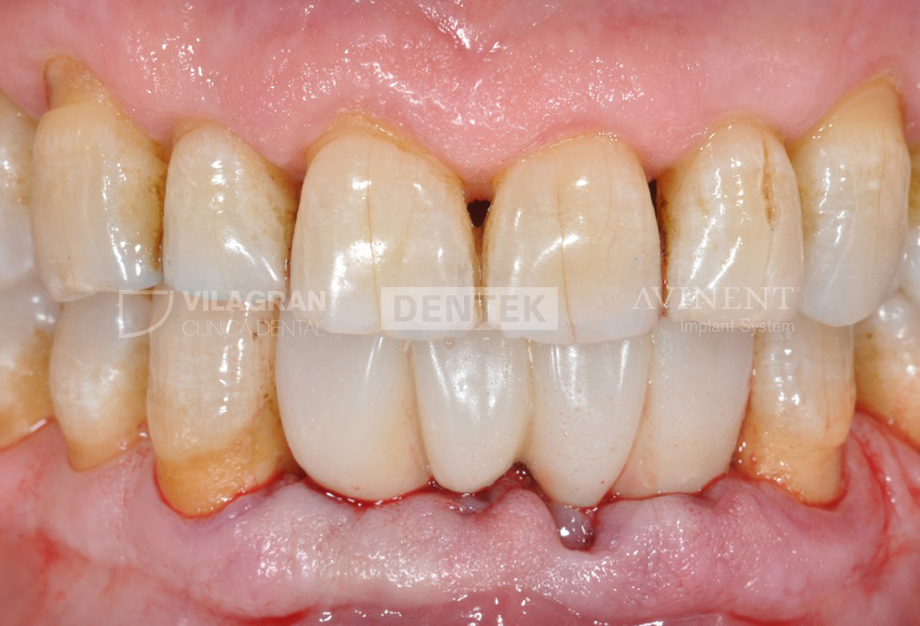
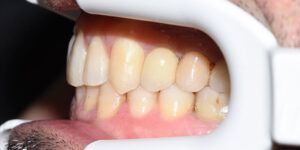
6. Immediate prosthesis placement.
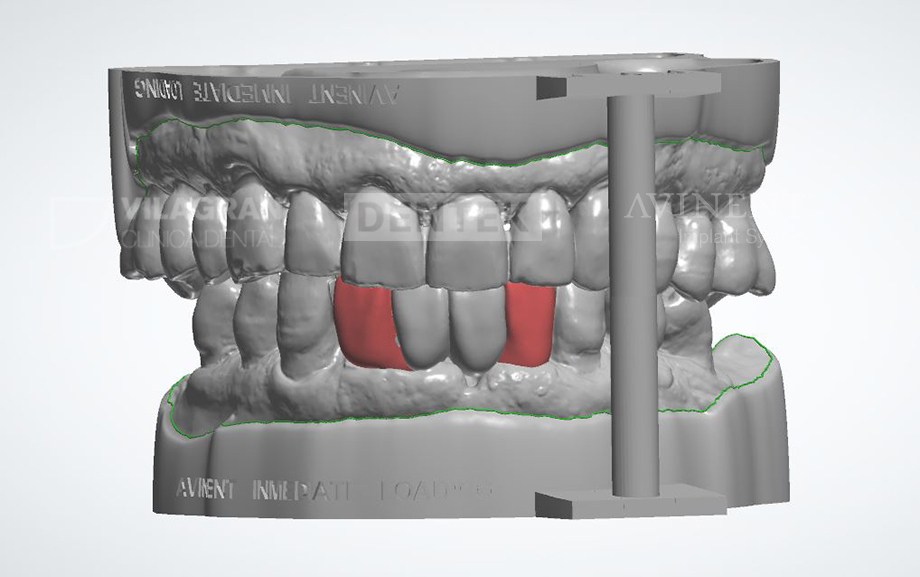
The immediate prosthesis with resin veneer is placed on the provisional PEEK bridge over the implants. We then placed the prosthesis, checking the seating of the lateral flanges and then preparing the guide over the posts bearing the prosthesis after dam isolation. In the final restoration the prosthesis is perfectly seated with an optimal cosmetic and functional finish.